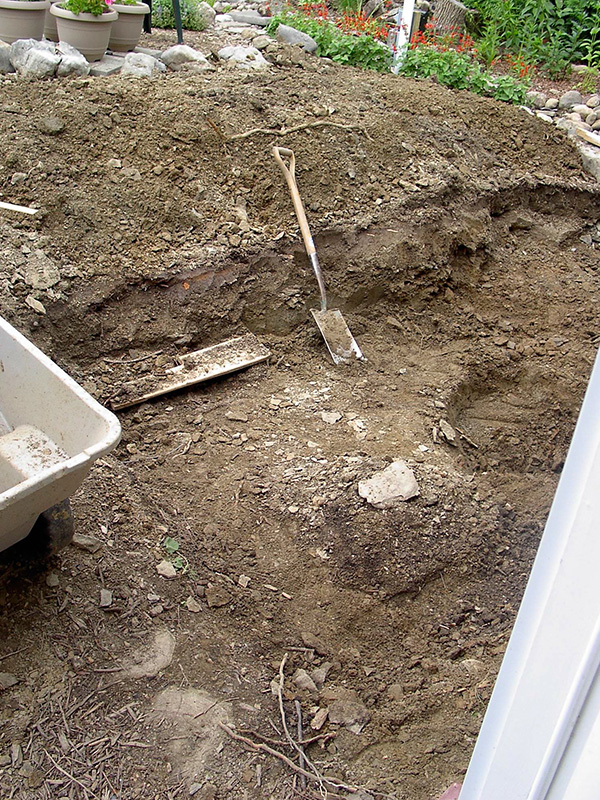
First, we reinforced the sitting area next to the original pond. Our yard slopes toward the house, which was a real advantage for our first pond since it made the stream look more natural. For this pond, though, that meant that the lowest point is at the house, so it made the area behind the sitting area that much higher when we dug it out to be level with the lowest point.
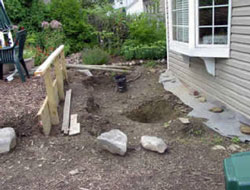
Our main problem was to figure out how to hold back the soil next to the sitting area in a safe and inexpensive way. A regular retaining wall would have worked, but would have been much pricier. Our solution was to use pressure-treated lumber held in place by posts set in concrete.
(Afterward, it occurred to us that we shouldn’t be using treated lumber, which is treated with toxic chemicals. In this case we hope there will be no harm done. It will not be adjacent to the water, but to a mulch-covered sitting area. From now on, though, we won’t be buying any of this type of lumber. But would non-pressure-treated wood even work without decaying anyway?)
We split the difference and reinforced the top two-thirds of the bank with treated lumber. The bottom third juts out some and is pretty solid since it’s the original soil about two feet below the original surface. We’re using this one-foot-wide area for planting.
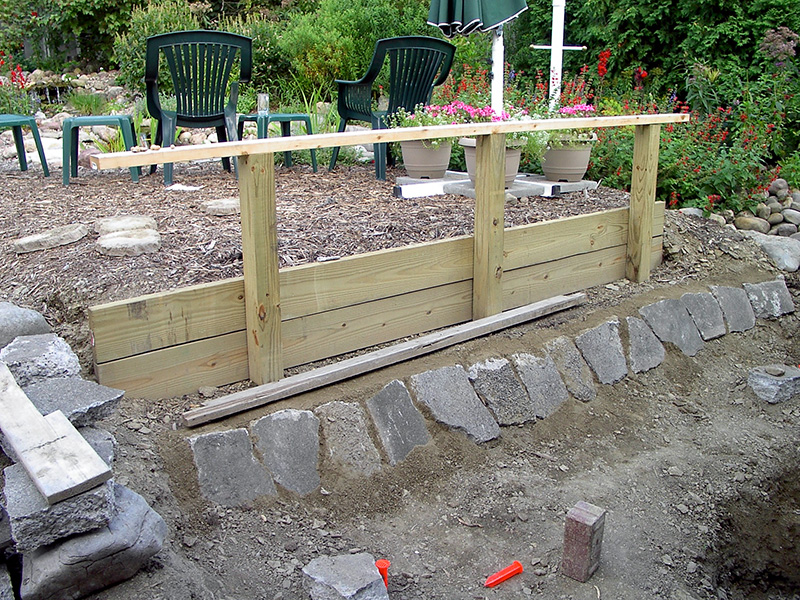
This shows the stones supporting the bottom third of the wall — actually pieces from our neighbor’s sidewalk (i.e. “urbanite”) they were replacing. We filled in the spaces with sifted soil.
(An aside: Producing concrete is a big source of the world’s pollution. Fortunately, this urbanite can be reused for walls etc. that can actually be quite attractive! It’s sad to see it so often piled up at the curb to be taken away to the landfill.)
The end of the original pond is in the upper left corner of the photo. The sitting area appears — with a little imagination — to be on a bridge of land on top of one continuous body of water. (And actually not that much imagination since people often ask us if they’re connected!)
Another use for sifted soil: adding water to turn it into mud to cover the sharp edges of shale. Our yard has a lot of shale beneath the surface as do the surrounding yards in the neighborhood . This has been a real difficulty with both ponds. We’ve ended up with a lot of stone debris — but stone debris that is pretty useless for anything since it’s so brittle.
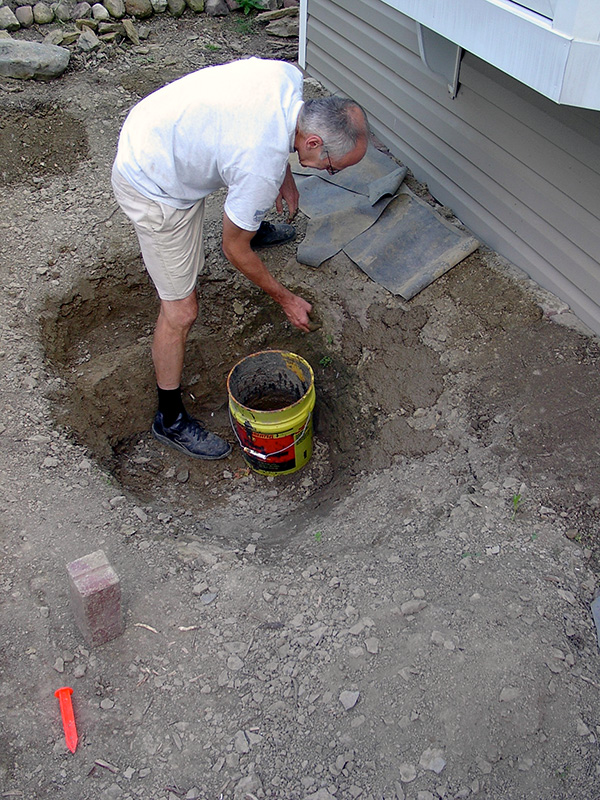
The planting pocket for a water lily is at the upper left of the big hole. The standing brick at the lower left is there to indicate the probable maximum water level. It’s important — REALLY important — to keep thinking ahead as much as possible when you’re designing a pond.
We were basically designing it blind, without any way of testing its functionality during the design/build process. (And the larger problem is that we were designing it without any prior experience!)
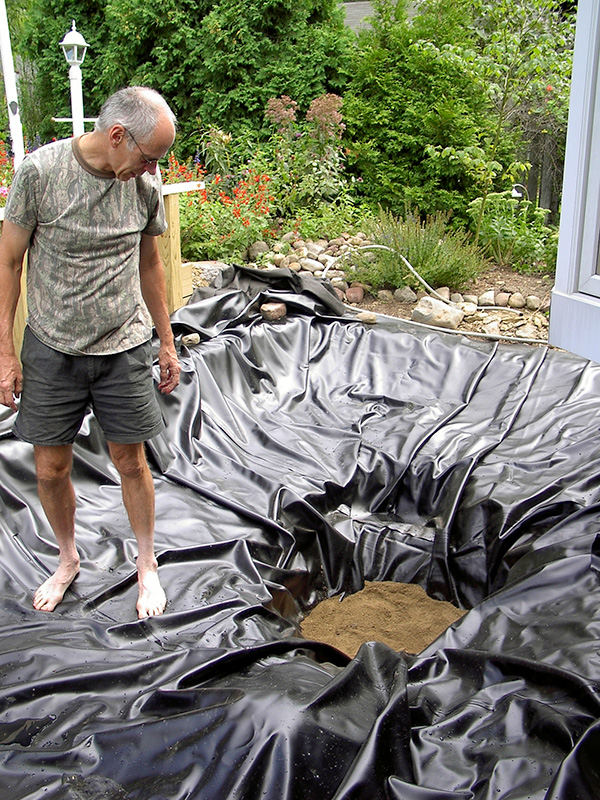
We then spread the underlayment and the PVC liner. We used PVC for this pond as opposed to the EPDM 45 mil we used for the first pond. The PVC is advertised as being stronger even though it’s thinner. It was more expensive so I hope they’re correct.
This photo also shows the large, very deep hole in the middle that was intended to provide a place for frogs to hibernate. This was first lined, then filled in with soil so that the ultimate depth is just under two feet with a mud-filled hole in the middle.
After using a LOT of extra liner (and thus much more money) to make this deep pocket of mud, I learned that frogs don’t actually bury themselves deep in the mud, so it wasn’t necessary. Having a hole in the ice is necessary, though, and we’ve had some problems with that. We haven’t successfully overwintered frogs.
One year, we experimented with leaving a PVC pipe in each pond so there is a place for air exchange. I checked it each morning and poured in some warm water if it had iced up. It didn’t work, though, and our frogs didn’t survive the winter.
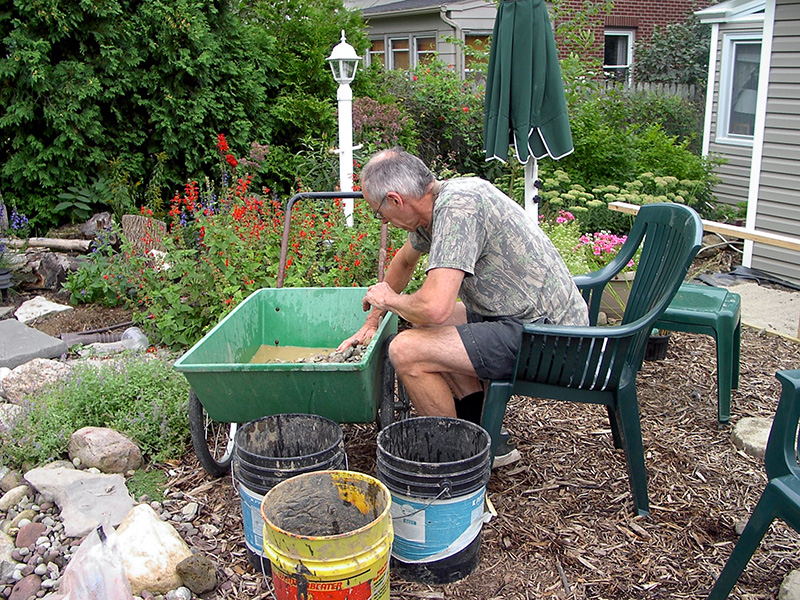
Since the bagged stones were very dirty with who knows what kind of dirt, we decided to wash them first. We also removed any sharp pieces of stone.
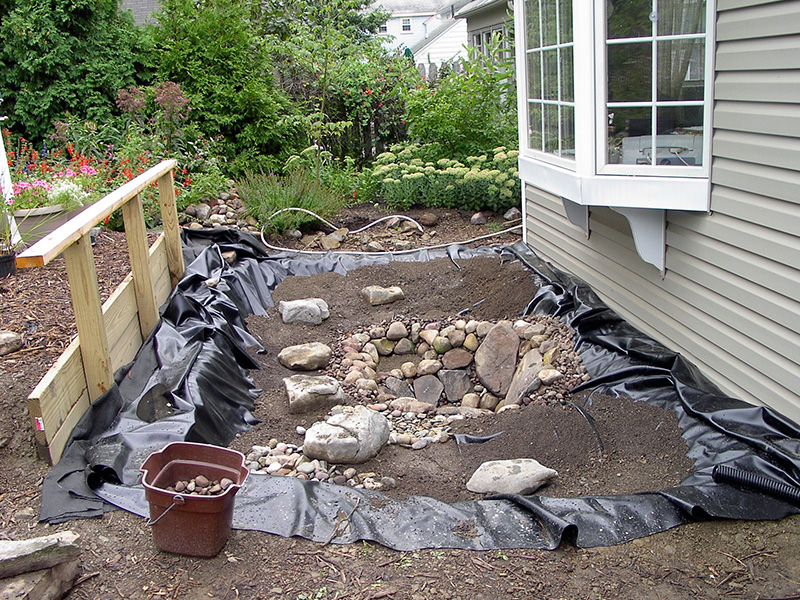
We added sifted soil, some large glacier boulders for stepping stones (since I didn’t have room to leave a path), and we started to add stones. We bought large flat stones to line the wall of the deep hole in the middle.
Unfortunately, the stepping stone path didn’t work out. Most of the stones weren’t high enough to be above water, so there isn’t really any way to walk across the area.
Looking back, it would have been wise to leave space between the pond and the house so we had better access to the windows.
Oh, well …
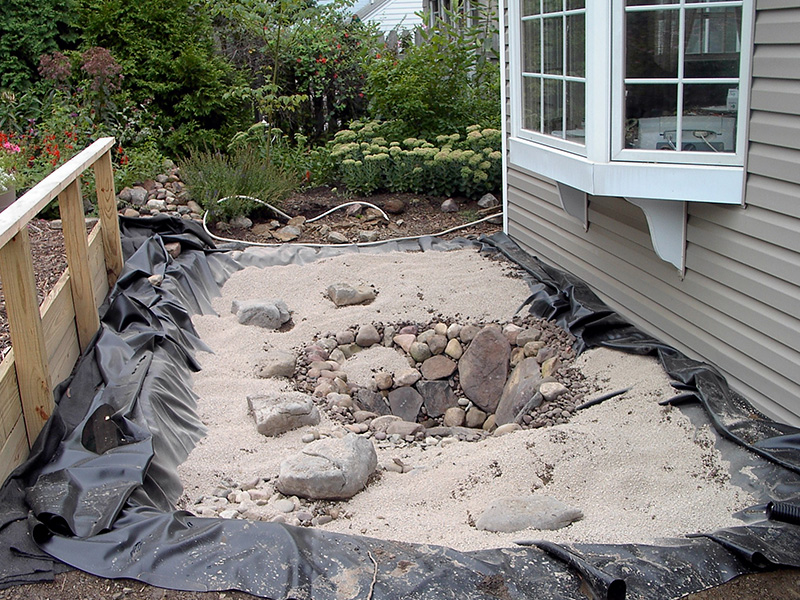
After adding soil, we added kitty litter — yes, kitty litter. Why? Because it’s just pure clay. We made sure we didn’t get any with deodorants etc. added. We added this to try to keep the soil in place. Was it a good idea? Was it even necessary? We’ll never know. We did this because that’s how we had created the lily planting pocket in our original pond.
On the one hand, we’re trying to create a natural pond; on the other, natural ponds develop naturally, not with a liner, so we felt we could/should make some of these adjustments. We had to experiment since at the time there was very little guidance available for creating this type of pond.
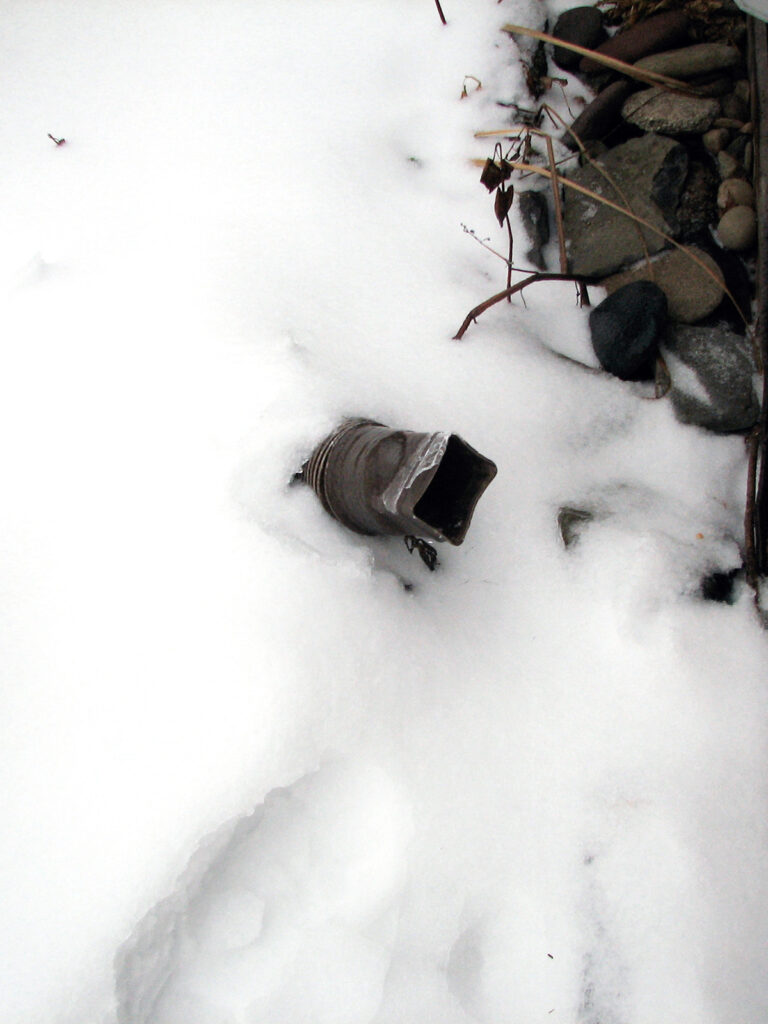
Another issue was how to deal with overflow. We’re fortunate in that even though it looks like it’s right against the house (and it is), this part of the house is a family room converted from a garage, so our actual basement is about 15 feet away.
If the pond does overflow, it’s unlikely to reach the basement. As of 2021 as I’m writing this, it never has.
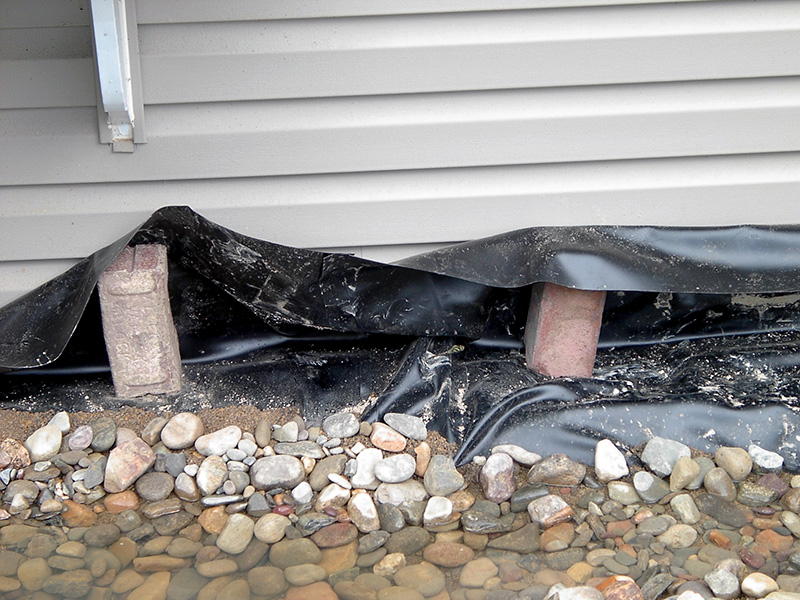
We put mini sandbags (sand inside the long plastic bags our newspapers are delivered in) along the back wall for added stability and to prevent overflow. We then pulled the extra liner around the sandbags.
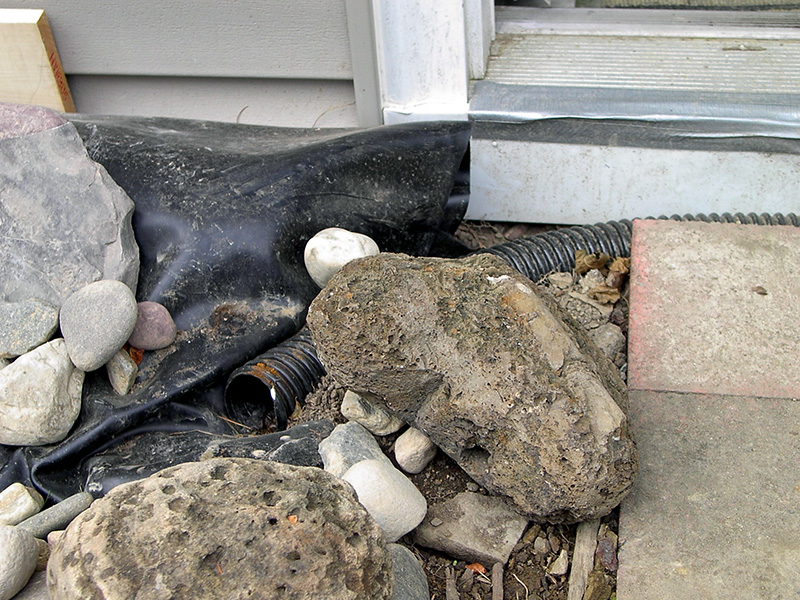
Here’s our solution. We laid some pipe at the edge of the pond in front of the door and ran it to the other side of the door sloping up. So far, it works, though it is seldom needed. The photo shows the workings of this overflow system, but we covered with a stone, so it’s generally not noticeable.
It’s important to have an overflow system, but in reality it’s rare that it rains so much that the water builds up to overflow level. Keeping the shallow pond with a large surface area filled is the bigger problem.
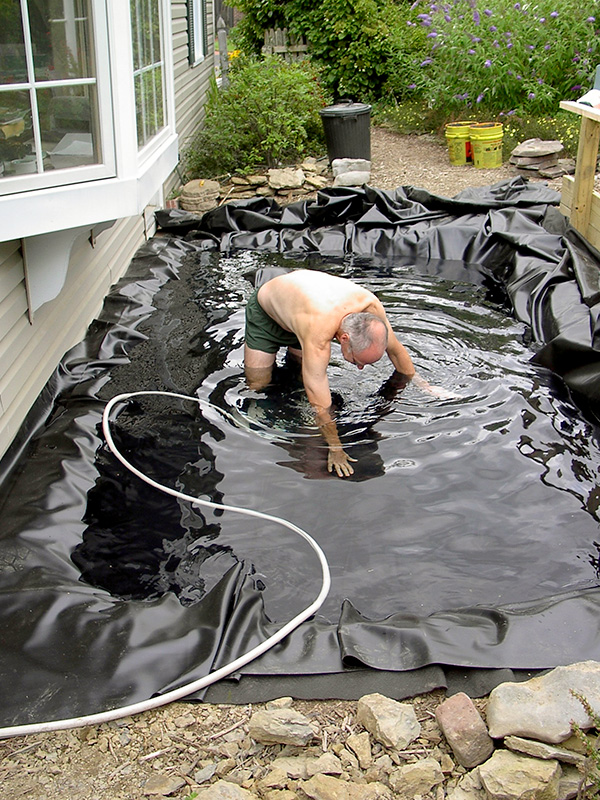
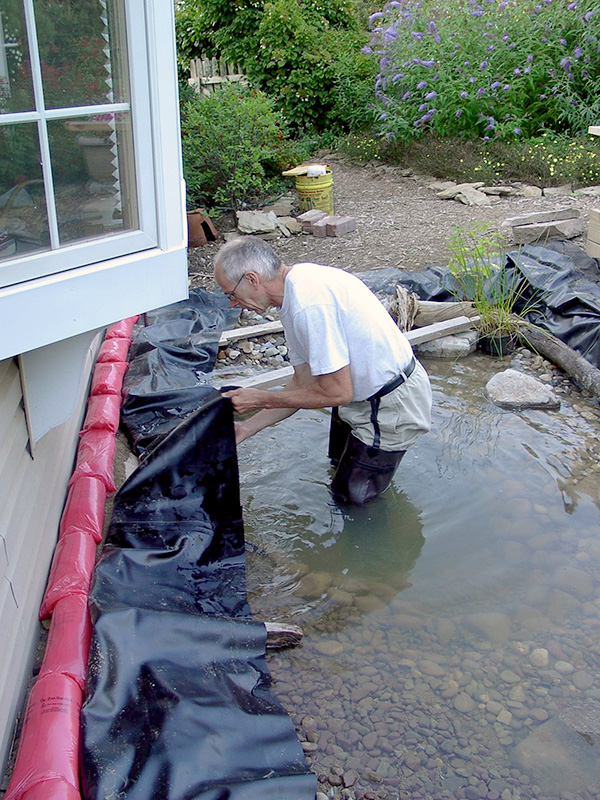
We filled the pond with water to see where the folds were going to go. We then emptied it (using the water to water our bushes out front).
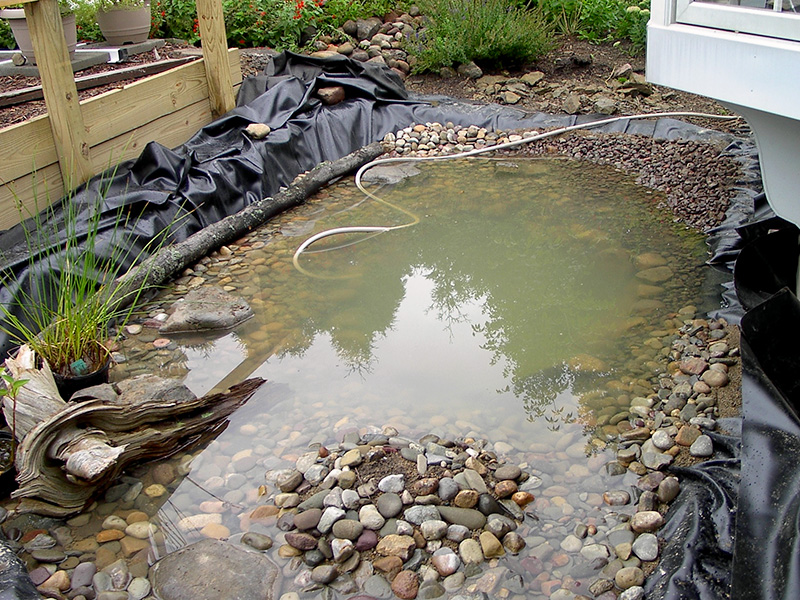
Here’s the pond the morning after we filled it. We had to make some adjustments so that the water would far farther up the pebble “beach” in the upper right corner. We hoped that putting kitty litter in was a good idea—the water was still pretty murky, but it settled out.
We stuck a few plants in and a piece of driftwood just to get an idea of what it will look like. We also added a mosquito dunk. At this point — before plants and animals moved in — the mosquito dunk was indeed necessary.
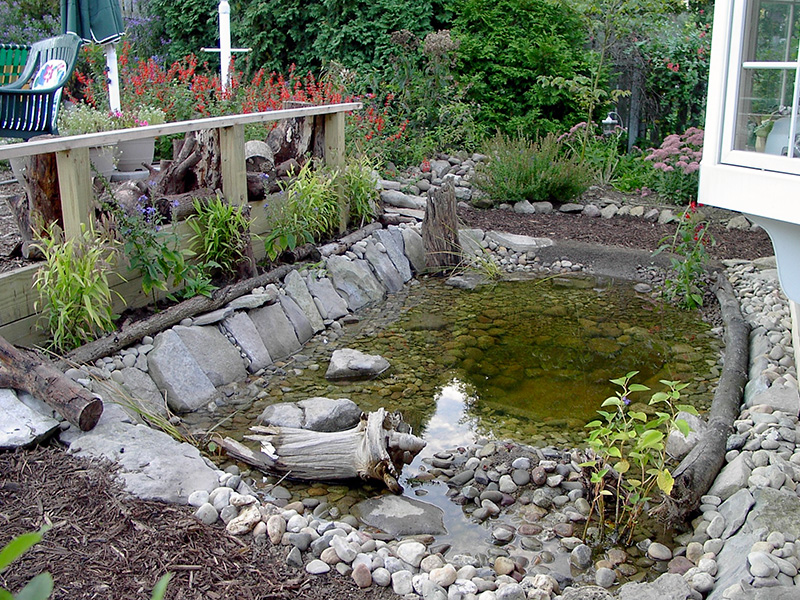
Wildlife pond finished!
It has functioned well as a place for dragonflies and other small creatures, including toads who use it to lay their eggs.
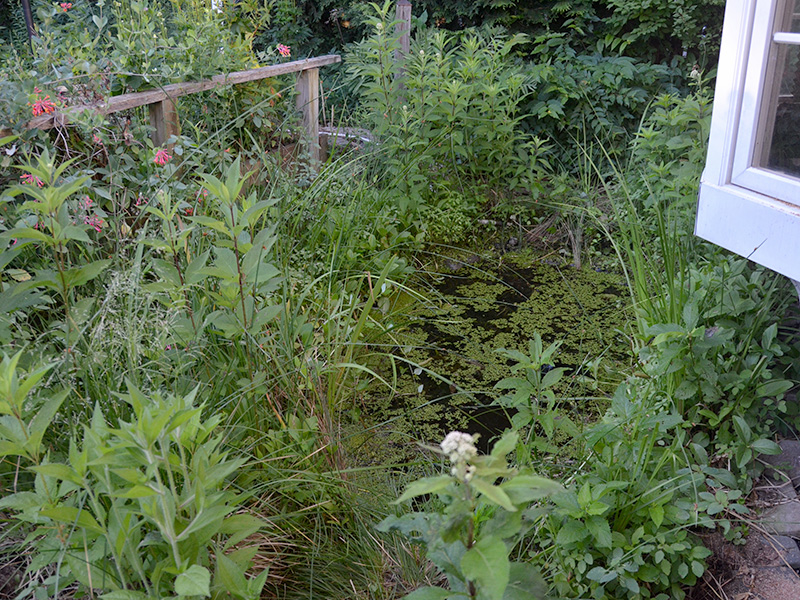
As with our first pond, plants grow vigorously with water! We’re now working to eliminate some of the excess. The floating duckweed is annoying, but we occasionally scoop it off with a pond net. It’s still, though, supporting a lot of life and I enjoy seeing it from the bay window.
Resources
It’s not hard to find information about creating an ornamental pond. They’re very popular…and profitable for companies to install. But it’s a different story for wildlife ponds. Here’s some more information I found:
- Biggs’ Wildlife Pond:
- Biggs’ Wildlife Pond is excellent website about a wildlife pond in California … that led to its owner writing a book on dragonflies! (And my wildlife pond above is included!)
- Robyn’s Pond Page:
- Robyn’s Pond Page – I’ve found some good information on these pages
- Cornell Cooperative Extension:
- Maine Cooperative Extension:
Reflections
The growth of algae in your pond in spring is normal. It is nature’s way of providing food for the many young amphibians that will be born.
~ Marlene A. Condon, Nature-Friendly Garden, p. 72