Fortunately, when we dug our pond we had the help of our then-17-year-old son, who was still at home. Although John did quite a bit of digging, a strong young man was almost a necessity.
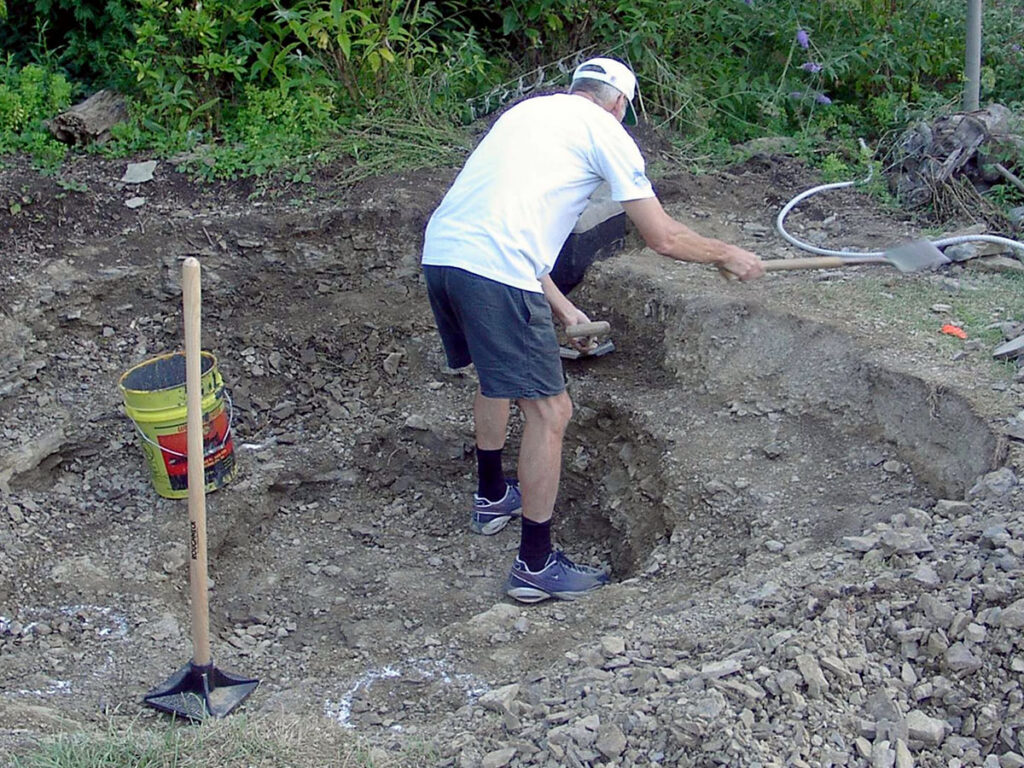
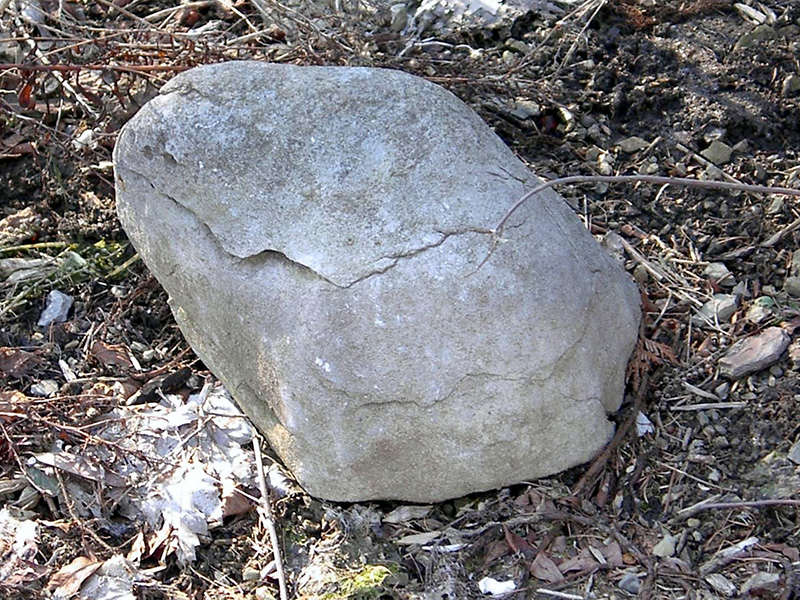
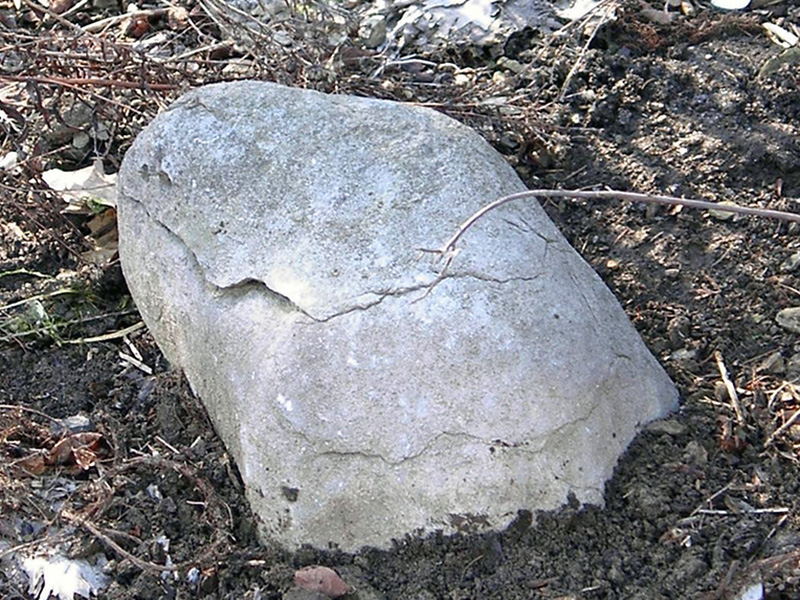
Unfortunately, we soon ran into a large bed of shale. The shale was a problem not only because it slowed down the digging, but also because it left very sharp edges.
Sharp edges are a concern when you’re building a pond that relies on a plastic liner to hold water!
(Note, though, that this isn’t the kind of plastic sheeting that you might get at a hardware store, but rather super-strong rubbery material.)
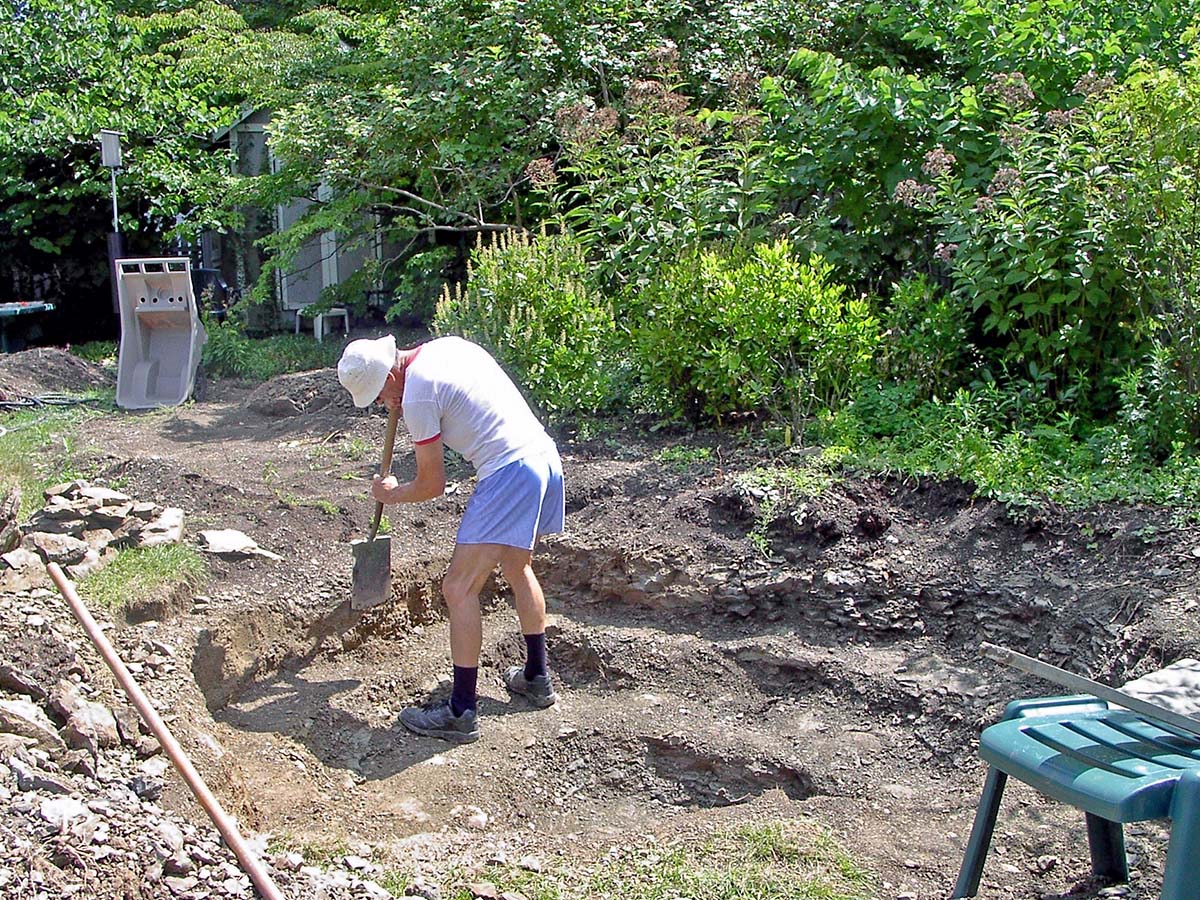
We built “shelves” into the hole so that there were different depths for different types of aquatic plants. We evened up the edges, cutting through the bits of shale. Note that the land at the back (near the wheelbarrow) is pretty level. That’s where the future stream will be.
We decided to cover up these vertical edges with mud made from sifted dirt, so here is John, “mudding” the sharp shale rocks. To add an extra layer of protection between the shale and the plastic, we also covered rough spots with old indoor-outdoor carpeting strips.


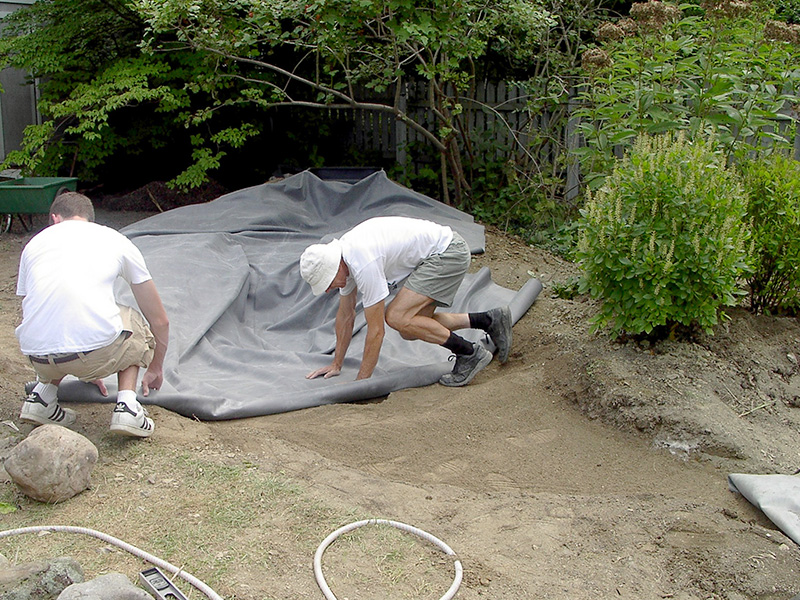
The next step was to place the underlayment that went beneath the pond liner. This came with the kit. I imagine this is intended to protect the pond liner and in most cases (without sharp shale pieces) it probably would.
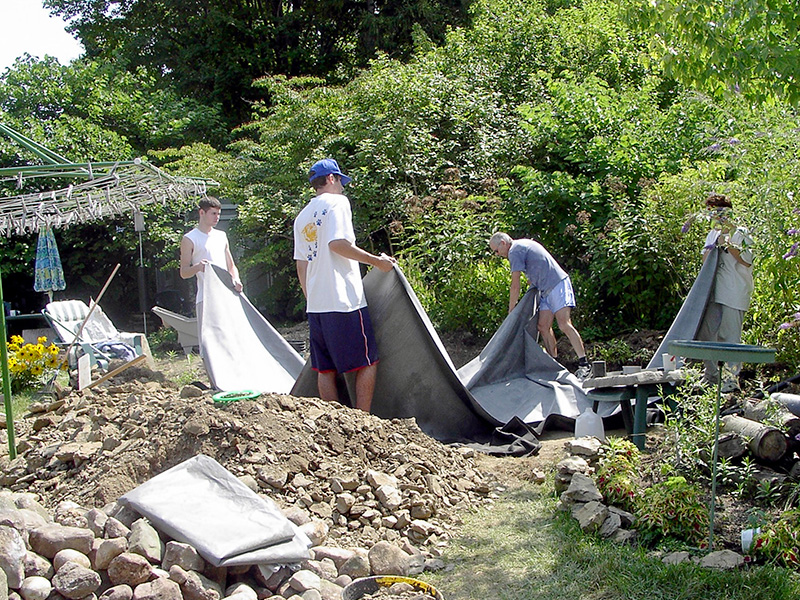
We all (including our son’s friend) helped spread out the liner, which was really heavy. It’s made of EPDM rubber, which is sturdy, but flexible, and most important, not toxic to wildlife. Note that pile of dirt in the front. We couldn’t believe how much dirt came out of that hole! (Guess where we’ll be putting it all…)
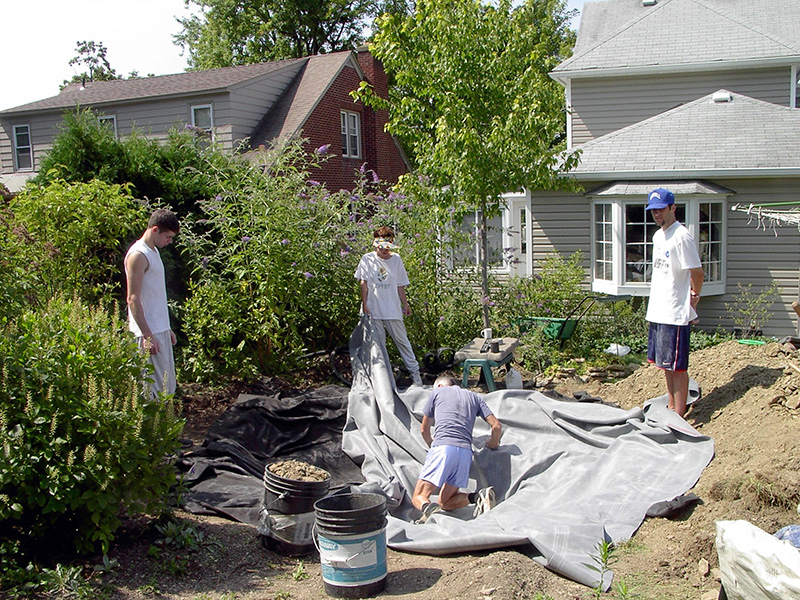
John arranged the liner over the underlayment — not a trivial undertaking. On the left, you can see the darker underlayment material, yet to be covered by the liner.
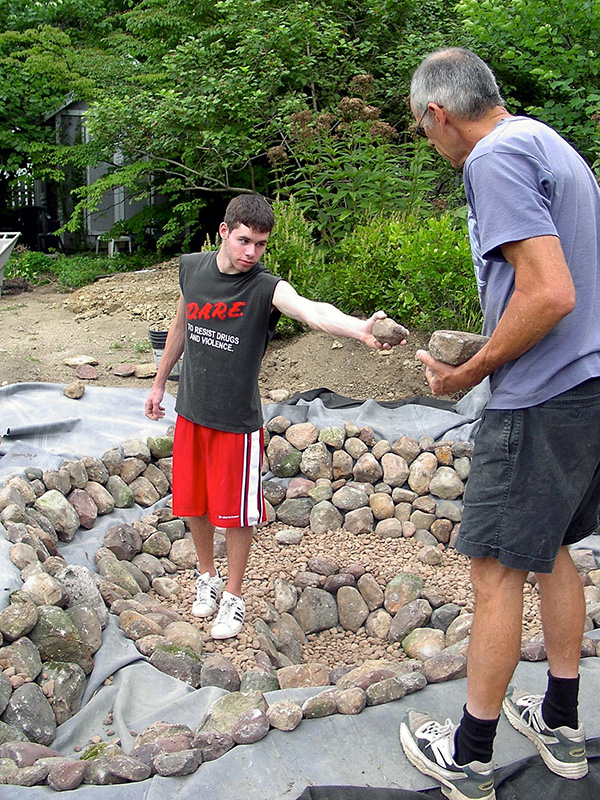
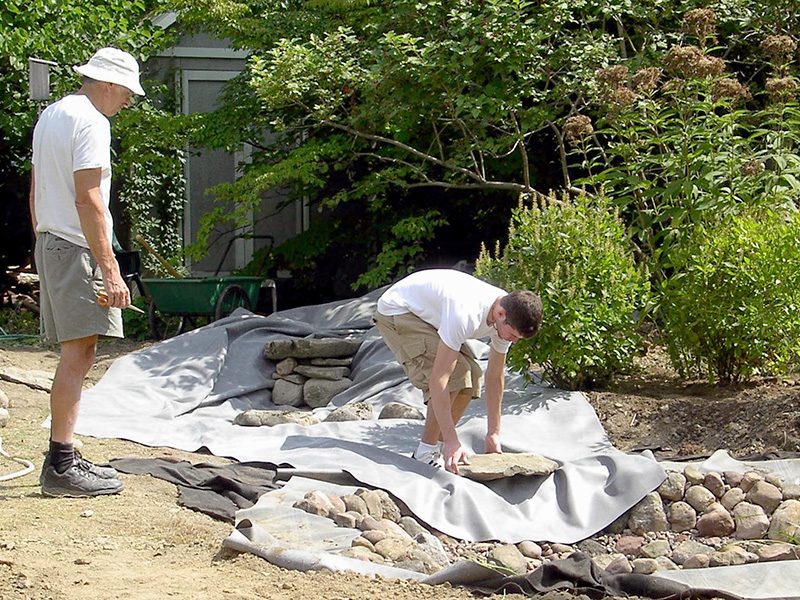
We added large rocks to stabilize the vertical edges and smooth river stones on the horizontal sections. Surprisingly (to us anyway), rocks were a big part of our expense. We spent about $1,000 (back in 2002) just on rocks and stones of various types. Unfortunately, since our back yard is fenced in, we had to have the rocks delivered to the driveway, and then cart them all in by wheelbarrow and by hand — though I dropped only ONE on my toe!
It’s a good thing we were younger back then!
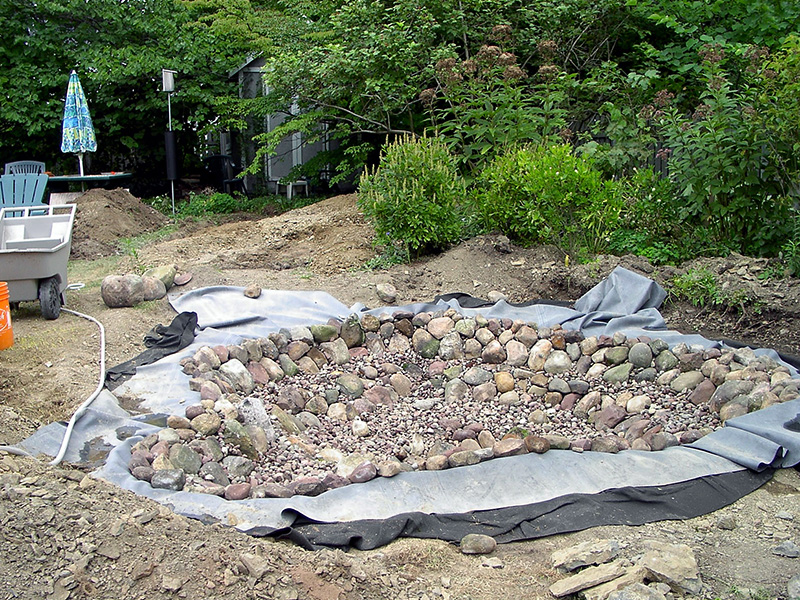
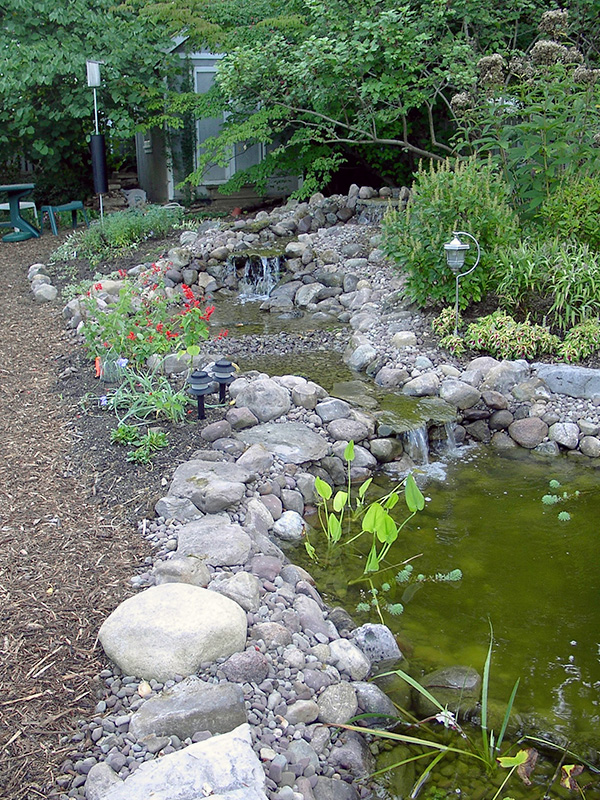
Finally! We have the entire surface covered with various types of stones. The purpose of all those stones (in addition to stabilizing the soil) is to provide a substrate for the beneficial bacteria.
The stream will be coming into the pond from the back. Note that the stream area has been built up and that there (coincidentally?) is now a smaller pile of dirt in the yard.

Digging the hole, covering the sharp edges, and manhandling the liners into the place was hard work. The physical labor was only part of it, though. The practical design decisions — not just the aesthetics, but the functional ones — were challenging.
That summer we went camping in the Adirondacks and visited a number of streams so we could simulate them as much as possible.
The Aquascape video and instruction book were helpful in building the pond, but were very sketchy on the stream and waterfall. As we continued, we were a little worried. What if we turned the water on and it all splashed out? What if the waterfalls didn’t work?
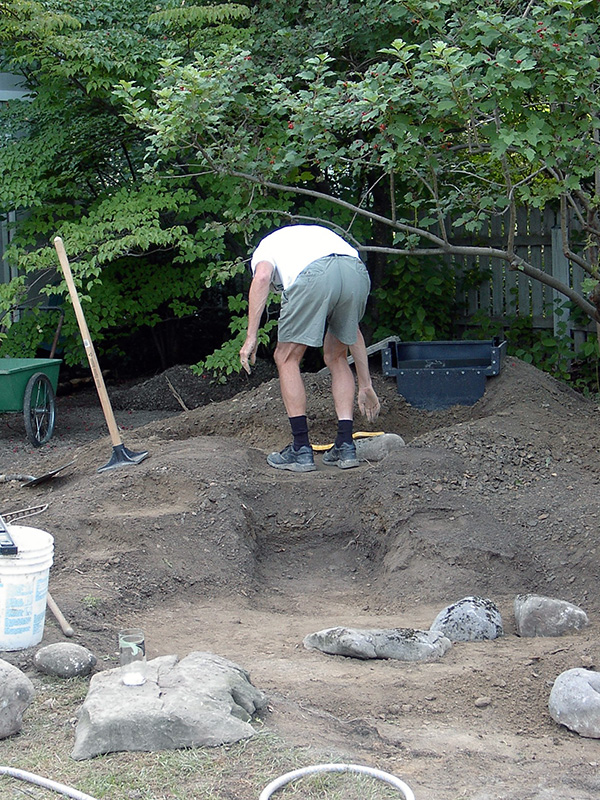
Here, the stream area has all been built up using the dirt and rocks we got out of the pond hole. We bought a tamper (the tool between the green garden cart and John) and tamped it down.
The black tub at the top is the BioFalls. The BioFalls contains bags of lava rock to filter the water and provide surfaces on which beneficial bacteria can grow.
We buried the bottoms of the large rocks into the soil some so they would look more natural. After a few years, they sank in a bit more and look like they always were there.
The stream liner being put down.

The stream liner overlaps the pond liner.
We were fortunate that friends gave us this and a few other special stones for creating the waterfall.
They were much more natural and more interesting than anything we could have bought.
Ta-da! It worked! It seemed like magic! Our yard was totally transformed. There was still a lot of landscaping and tidying up to do, but we already were enjoying it immensely.
We found that building a pond is one way to get rid of lawn! After weeks of being covered with dirt, most of the remaining lawn in the back yard was dead, but for us that was a bonus.
We now have bark mulch paths instead of grass. There’s a sitting area at the back of the yard, so even though there’s absolutely no grass in the backyard, there’s plenty of room for us — and no mowing!
We were surprised that birds initially seemed quite cautious when we first started up the stream. Even the usually-bold blue jays seemed to be afraid to fly over it. It was pretty frustrating since we had designed the wide, shallow, pebbly stream with birds in mind. I felt like shouting, “You’ve got wings. Use them!” I guess life is dangerous if you’re a bird — only the cautious survive. But it very soon became a bird hot spot.
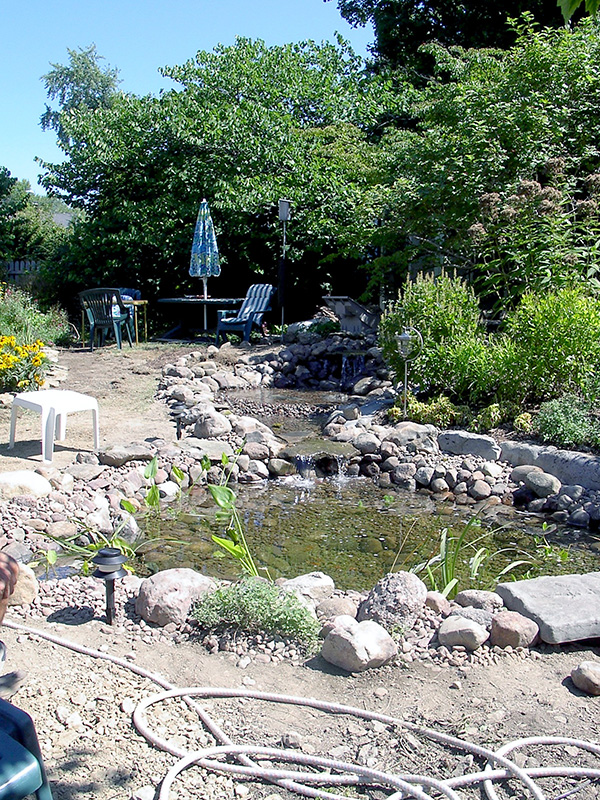
This is the broad part of the stream with the little rocky berm.
Note the middle waterfalls. The jagged rock turns and twists the water in an interesting way.
The photo doesn’t really do the pond justice. You really have to be there in person and hear the water to get the full experience. The biggest downside: it’s hard to stay indoors. We could just sit by the pond all day long.
Sadly, we realized that we needed to remove our recently-planted red maple (Acer rubrum) since this eventually large tree was planted so close to the pond. (This tree was planted about a year before we had decided to add a pond.) Our concerns were that the roots might affect the pond liner, and that the leaves would fill the pond in fall.
It was surprisingly easy to dig up since the landscaper who had installed the tree (“planted” would be too generous a term) had never removed the wire cage enclosing the roots! I guess it might have grown anyway, but it certainly can’t be a good thing for trees to be planted this way. And we had paid quite a bit to have this tree planted!
Once again, we found it’s better to choose and plant things ourselves. We can make our own mistakes far more cheaply. We’ve rarely been satisfied with the designs or plantings we’ve paid for.
Reflections
I think that if I had no pond, shared no lakeshore, abutted on no stream or marsh or river, I would build a little artificial wetland, however much tinkering it took with pipes and pumps and electrical connections. Maybe it wouldn’t be as ambitious as Michael’s meandering stream. Maybe it would be just puddle size. Maybe it would serve no more than a couple of hop toads whose burrows are underneath the garden wall. Toads live for thirty years. That should be long enough to sensitize several generations of children to the hoppers, pollywogs, and jelly eggs we must relinquish to their recollections and their care.
~ Sara Stein, Noah’s Garden: Restoring the Ecology of Our Own Back Yards, 1993, p. 190